what floor nailer to use with red oak tounge and groove
In my region, here in California's Bay Expanse, older homes typically accept a floor not usually establish in many other areas: solid 5/16-inch-thick, top-nailed oak floors. Some are ii inches wide with a square edge, some are random widths with a full bevel and walnut pegs, and some are parquet floors. That is why most flooring contractors effectually here must know how to renovate, install, sand and finish these floors (at that place are as well pockets of this flooring in other regions of the country, such as Philadelphia and New York). If y'all mainly do tongue-and-groove floors, then you will be surprised and challenged by working with these superlative-nail floors (and vice versa). I accept learned the following while working on these floors over the last decade.
Chore-Site Weather
As always, information technology is of import to follow the NWFA Guidelines regarding chore-site conditions and acclimation. Treat these floors like plank flooring; when acclimating the woods, stay within two points of divergence in moisture between the subfloor and the wood floor. These floors do non tolerate a lot of movement well-there is no tongue and groove, so stop nails are all that is property the boards down.
In the Bay Area most installations are on-grade or in a higher place-grade over a wood subfloor; in older homes they are 1-past-8 solid lath subfloors. Some take shifted in parts and are no longer straight, and some take sagged. When homeowners add onto their homes they ask us to install new floors over these subfloors where they previously had carpeting or other floor coverings. A minimum of 3?8-inch CDX plywood needs to be installed over the old subfloor (glued and mechanically fastened) before installing a new top-blast floor.
Installing five/16 Flooring
The thickness, or lack thereof, of this 5/16-inch floor creates challenges for installers. Here are some tips:
Get the subfloor dead-on flat. If your subfloor has variations in it, you lot will most likely split the floor as you nail it. The other trouble yous will have is trying to sand the floor flat-you don't desire to exist sanding downwards more than one/32 inch on your new floor, because you will come across nails very fast and exist out of wood to concur them in place.
Use an approved vapor retarder. Avert using roofing felt, as the asphalt may estrus up while sanding and bleed into the floor.
Mix bundles. The floors come in nested bundles in different lengths. Make sure yous mix your short and long bundles when racking for joint location, color and grain uniformity.
You can fix your first row anywhere. I usually place the first row forth the longest line I have and mark my nail schedule with a pencil 1½ inch from the ends and every 7 inches along the face up. Later you nail the first row, you tin can rack as many rows as you want and rough-blast a few rows at a fourth dimension. I unremarkably drive a screwdriver into the subfloor and pull the floor together, and and then I randomly place enough nails to concord the floor tight. When yous are done, you lot simply transfer your marks from the first row and utilise a straightedge to end nailing the flooring.
Check the settings on your compressor. If your psi is as well high, you will drive the nails too deep and the flooring will carve up very easily. If your psi is besides low, you volition be setting a lot of nails by hand.
Sanding Meridian-Nailed Floors
Again, follow NWFA Guidelines for sanding and finishing, but continue in heed the post-obit procedures that brand these floors a little dissimilar:
Gear up nails as you lot go. I can't emphasize this enough. Doublecheck when done installing, again when you vacuum, and again before you start sanding. These nail heads are nasty and will go your drum and your edger. Did I mention they are difficult to see?
Use the right filler. Some fillers are good at filling grain simply not at filling nail holes-they will show a slight depression over each nail pigsty and, when the floor is stained, they accept the stain darker than the floor. I have plant that making your own filler works the all-time. Usually when you do this you are using products that olfactory property horrible and are extremely combustible, and so go along the job site well-ventilated. But I find that for the best colour friction match and a true-flat nail pigsty, it is the way to go.
Sand with good lighting. When fine-sanding the filler off the floor, work carefully in a well-lit surroundings. It is easy to miss a spot, and the buffer won't have care of information technology.
Work with a nail fix. If yous hit a smash head with your drum on an erstwhile floor you will put a scratch in your floor. It's likely that you volition not see this until your finish glaze is dry, so alter your belts more frequently.
Successfully installed and finished, a solid top-smash flooring tin can last more than than 100 years. It is our job as contractors to continue upwardly with the need for all different products; and here, this summit-smash product is a must if you want to stay in business.
Run into photos of v/sixteen woods flooring:

An old solid board subfloor, normally found under five/16-inch wood floor.
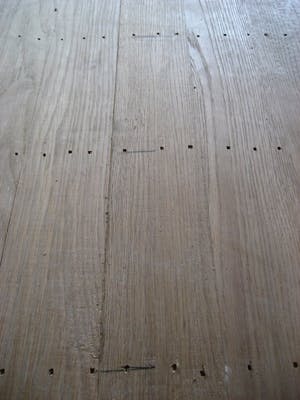
A new top-nailed 5/16-inch wood floor before sanding.

A random-width plank height-nailed forest flooring with plugs.

An existing top-nailed plank flooring with plugs in the Bay Area.

A new stained ruby oak top-nailed 5/xvi-inch wood flooring in the Bay Area.

A new five/16-inch strip pinnacle-nailed oak wood floor in the Bay Area.
Source: https://www.woodfloorbusiness.com/15125290
0 Response to "what floor nailer to use with red oak tounge and groove"
Post a Comment